

Fly it! ImageExport (the basics)
Set it up
Before you use ImageExport, you'll want to customize it to suit your needs. You do this using its Preferences dialog box. To access ImageExport preferences, click the Preferences icon on the ImageExport toolbar. It looks like this:
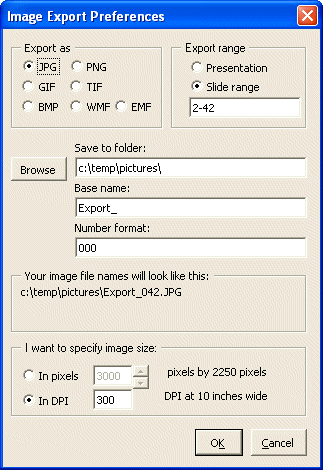
Or from the main menu, choose PPTools, ImageExport, Preferences. Either way, you'll see this dialog box:
Or depending on the options you choose, the dialog box might look like this:
Give it a try
There's detailed information about each option in ImageExport Overview but for now, just choose the following options to get you started quickly:
- In the "Export as" area, click PNG
- In the "Export range" area, click "Entire presentation"
- Click Browse and choose the folder you want to export your images to
- Under "Base name:" type the name you want each image to start with (for example, type "Slide" to have ImageExport export Slide001.PNG, Slide002.PNG and so on)
- In the "I want to specify image size" area, click "Pixels" and under "Image width (pixels)" type the width you'd like for your images. Try 1024 for now. ImageExport automatically calculates the correct height based on the proportions of your slide.
- Click OK to export all the slides in your presentation as images.